
目錄
In the current scenario, with the impact of the pandemic, many physical stores have faced challenges. To adapt, numerous businesses are establishing their online presence. The evolution of the internet and the influence of the COVID-19 pandemic have made online marketing a prevailing trend.
For those who lack coding skills, building an online store from scratch can be a daunting task. Shopify addresses this concern, allowing users to effortlessly create a web store without the need for coding knowledge. This article provides a comprehensive guide to Shopify.
dumbChat.AI is a system that connects and integrates your social media and instant messaging accounts such as WhatsApp, FB messenger etc.. The intelligent robot can quickly respond to customer needs, automatically process orders and speed up transactions. Click here for pricing details.
Shopify Overview
Shopify, created in 2006 by three young Canadians initially aiming to sell snowboards online, has grown into a platform used by over a million e-commerce businesses worldwide. It went public in the United States in 2014. Shopify supports the use of Chinese and has gained popularity, especially during the pandemic, with many merchants opting for Shopify to build their online stores.
Shopify is a platform that allows users to independently build an e-commerce or online store. Users can register for an account and pay a monthly fee, eliminating the need to rent servers or install complex software. With Shopify, it becomes possible to create an e-commerce platform where users can design their websites, list products, manage the backend, engage in online marketing, and more. Moreover, Shopify is not limited to physical products; it also supports the online presence of digital goods such as e-books and consulting services.

Advantages of Shopify
1.Easy to Use
Shopify offers a user-friendly interface, making it accessible for beginners with or without computer programming knowledge. It has a Chinese version, making it particularly friendly to users in Hong Kong and Taiwan.
2.Extensive Support and Tutorials
With over a million merchants using Shopify, finding solutions to common issues is convenient. The Shopify Help Center and various tutorial videos are valuable resources. Additionally, 24-hour customer support is available.
3.Convenient Online Marketing
Shopify provides comprehensive SEO tools, enabling merchants to optimize their online stores for search engines like Google and Bing. It integrates with eDM (email marketing) tools, Google Merchants Center, and Facebook for paid advertising.
4.Detailed Data Reporting
Shopify automatically collects various data, including sales, customer, and marketing data. While complete data reporting may require a higher-tier paid plan, the provided data is sufficient for most startups.
5.Easy Customer Data Management
Managing customer data is crucial for any business. Shopify allows easy management and export of customer information.
6.Exportable Website Data
Shopify enables the export of website data, facilitating a smooth transition to other platforms if needed.
7.Fast Website Access
Shopify-built websites offer fast loading speeds, enhancing the overall user experience.

Disadvantages of Shopify
No Permanent Free Version
Shopify offers a 14-day free trial, and afterward, users need to choose a paid plan. While no platform provides a permanent free version, establishing an online store incurs costs.
Lower Flexibility
Although Shopify is easy to use, it may limit flexibility in certain aspects, requiring coding knowledge for specific modifications. However, it is sufficient for most small and medium-sized enterprises, and additional applications are available.
Potential Additional Transaction Fees
When using third-party payment providers, Shopify may charge transaction fees ranging from 3% to 4%. Even in the case of refunds, these fees may still apply.
How to Set up a Shopify Store
Account Registration
Account Registration
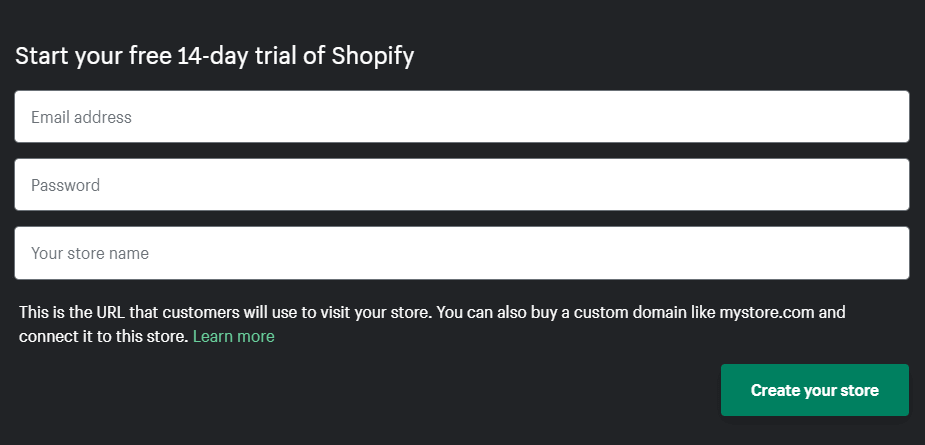
- Start a 14-day free trial on the Shopify website.
- Enter email, password, and store name to create an account.
You’ll be able to change the language setting in the next step.
Shopify will also ask for more information on your store and personal information. These questions are optional to answer.
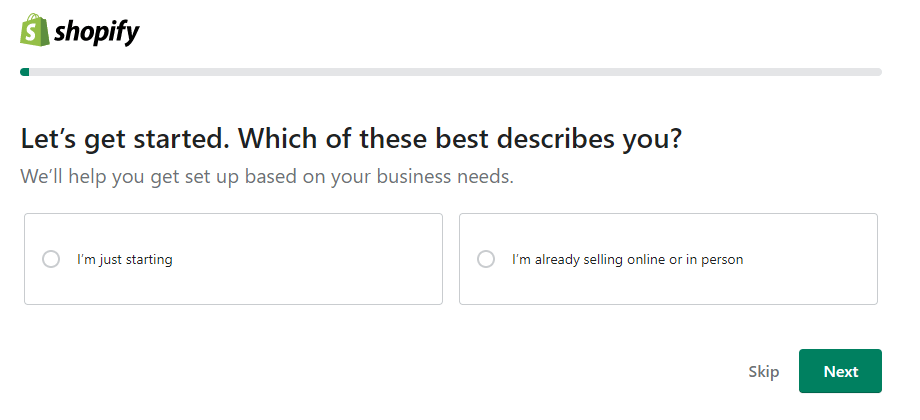
Click “Next” to start creating your store.
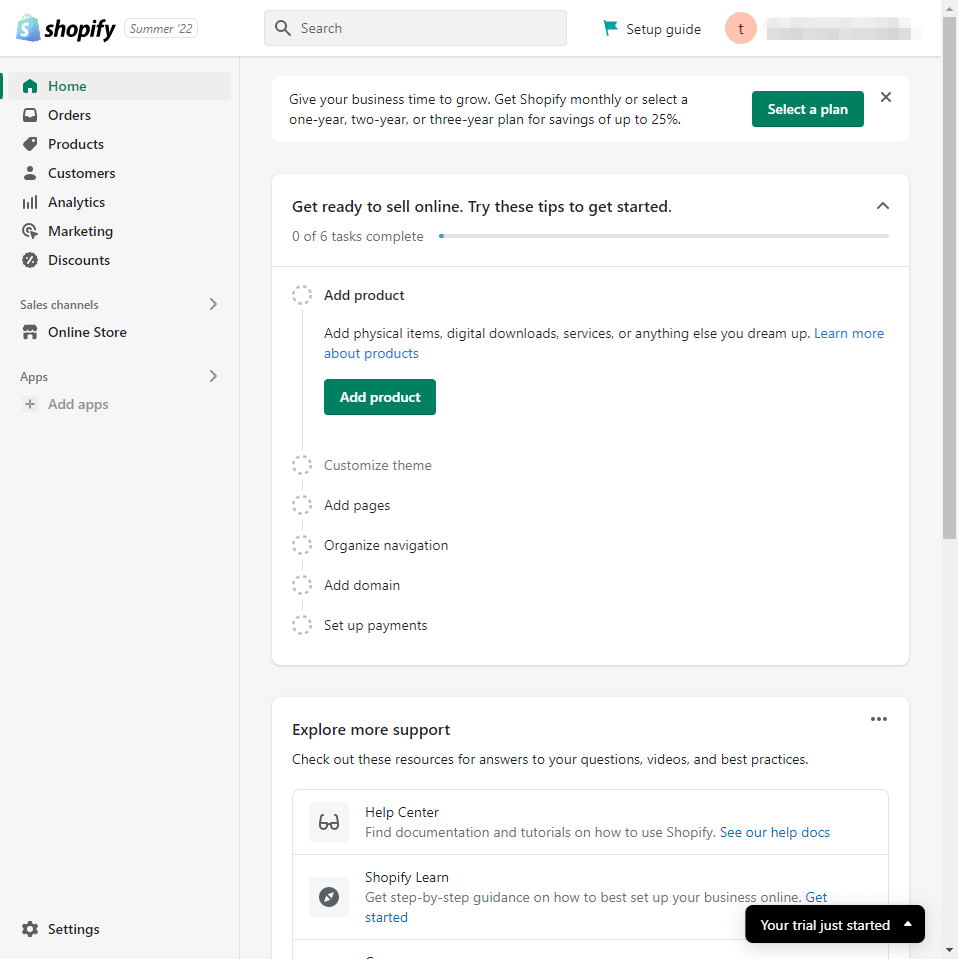
Language Configuration
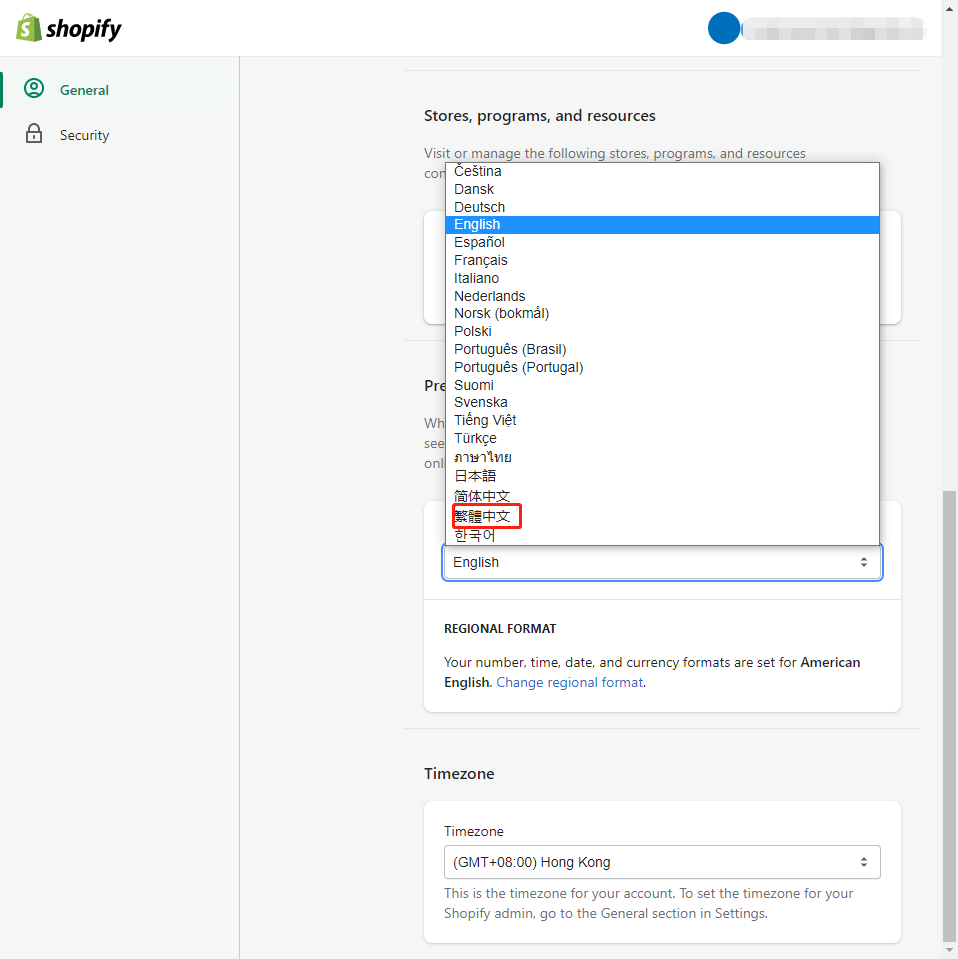
At this point, the interface is still in English, but you can set it to Traditional Chinese. There are two language settings: one for the store language and one for the interface language.
To set the interface language, click on the email address in the top right corner. A dropdown menu will appear; select “Manage account.” Once you’re there, scroll down to find the “Preferred language” option. Click on it, choose “Traditional Chinese”, and then save your preferences.
Product Upload
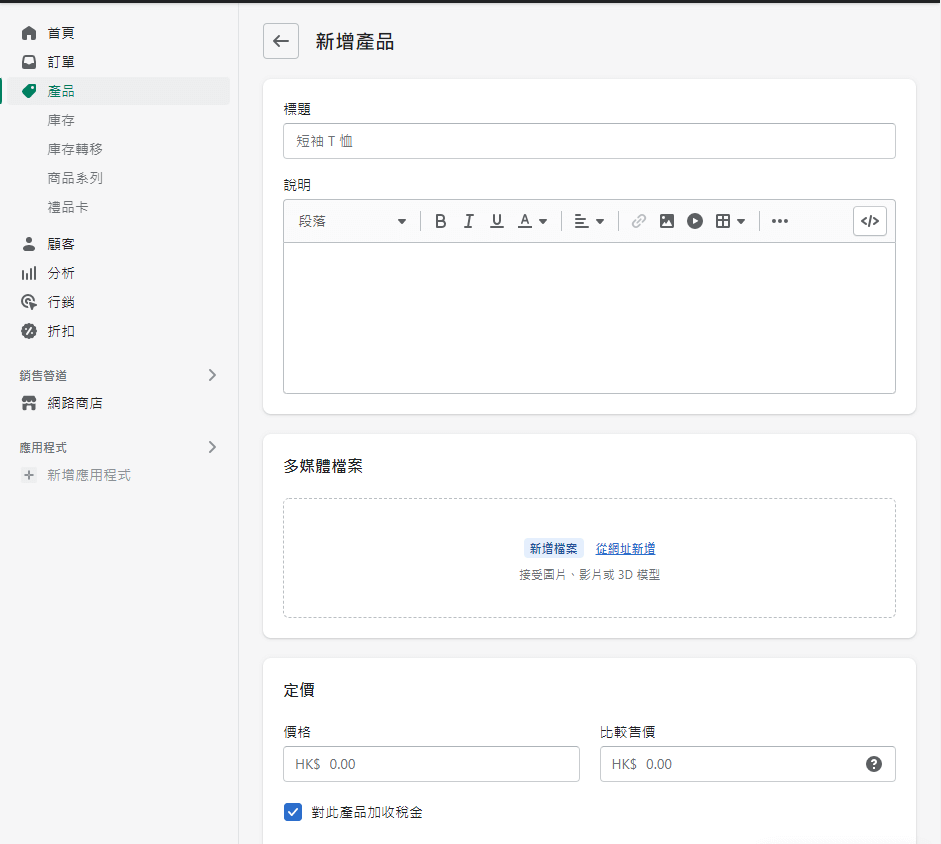
it’s recommended to list your products before starting to design the store theme. This way, you can choose a theme that suits your products.
Click on Products >> Add product. Fill in the relevant information based on your products. If you have multiple products, you can also choose to import them simultaneously.
Theme Customization
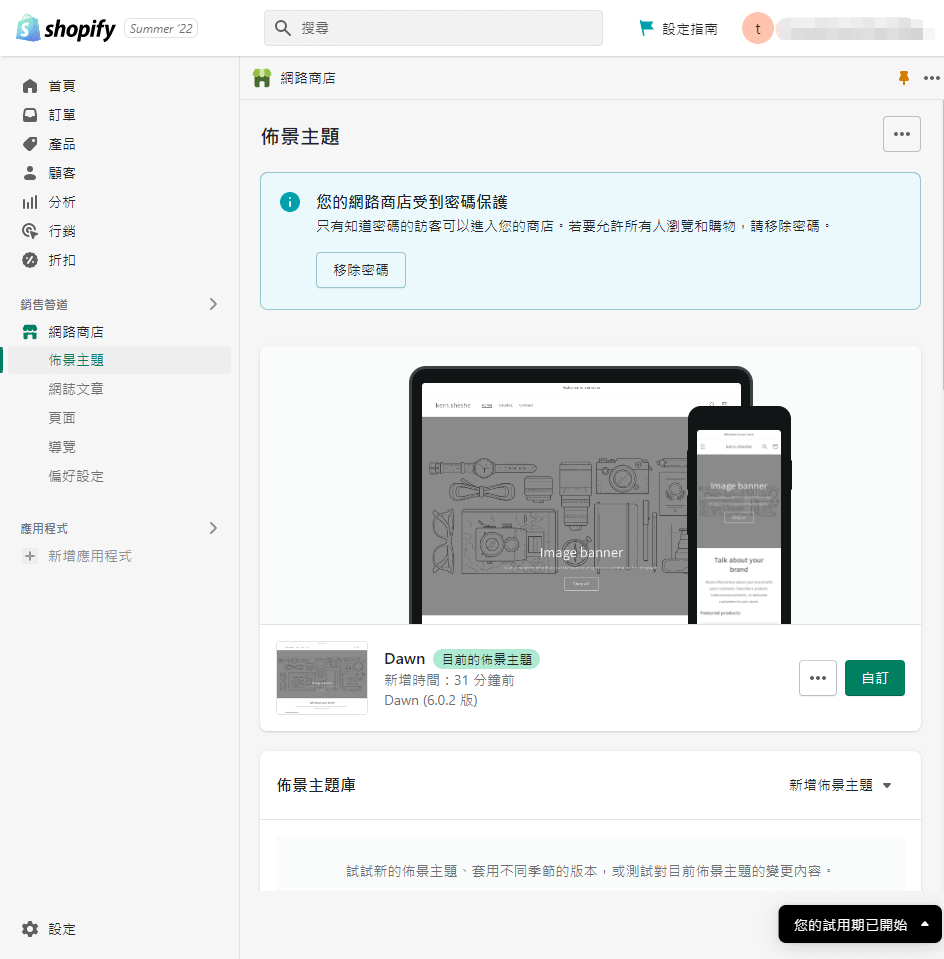
Setting up the store theme on Shopify involves choosing from various themes, most of which are paid. There are around 20 free themes, but they may have lower flexibility. If you have some knowledge of website construction, you can opt for a free theme and customize it later. For those less familiar, selecting a suitable paid theme and making simple modifications afterward is an option.
After choosing a theme, you can customize it by going to Online Store >> Themes >> Customize. This is an interesting process, and the operations are quite simple. You can personally design a website that suits you.
Setting Up Additional Pages
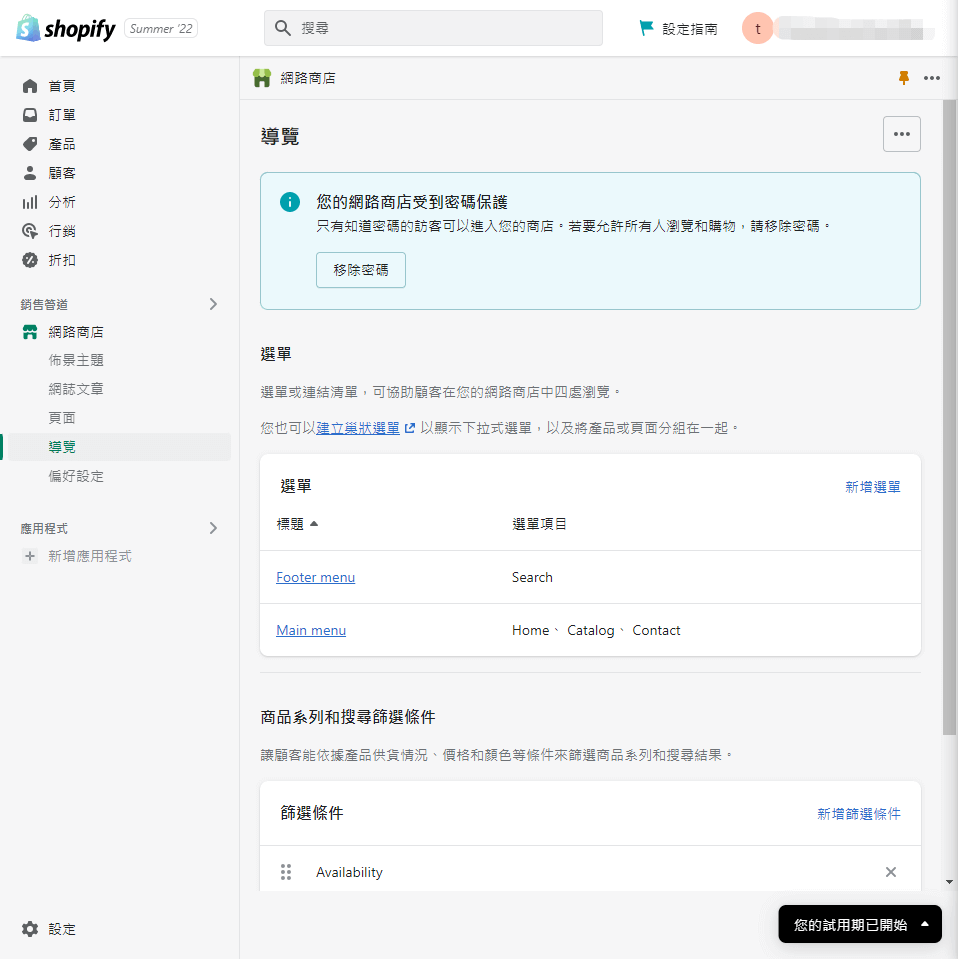
A website consists of multiple pages, and having just a homepage and product pages is not sufficient. You’ll likely need additional pages like “About Us,” “Contact Us,” “Frequently Asked Questions,” and more. To create these pages on Shopify:
- Click on “Online Store” >> “Pages” >> “Add page” to start designing your pages.
- After designing the pages, you need to take an additional step to add them to the main menu. Click on “Online Store” >> “Navigation” >> “Main menu.”
- Here, you can set up your Main menu by adding the newly created pages. The menu at the bottom of the website can be configured in the “Footer menu” section.
Configuring Payment Methods
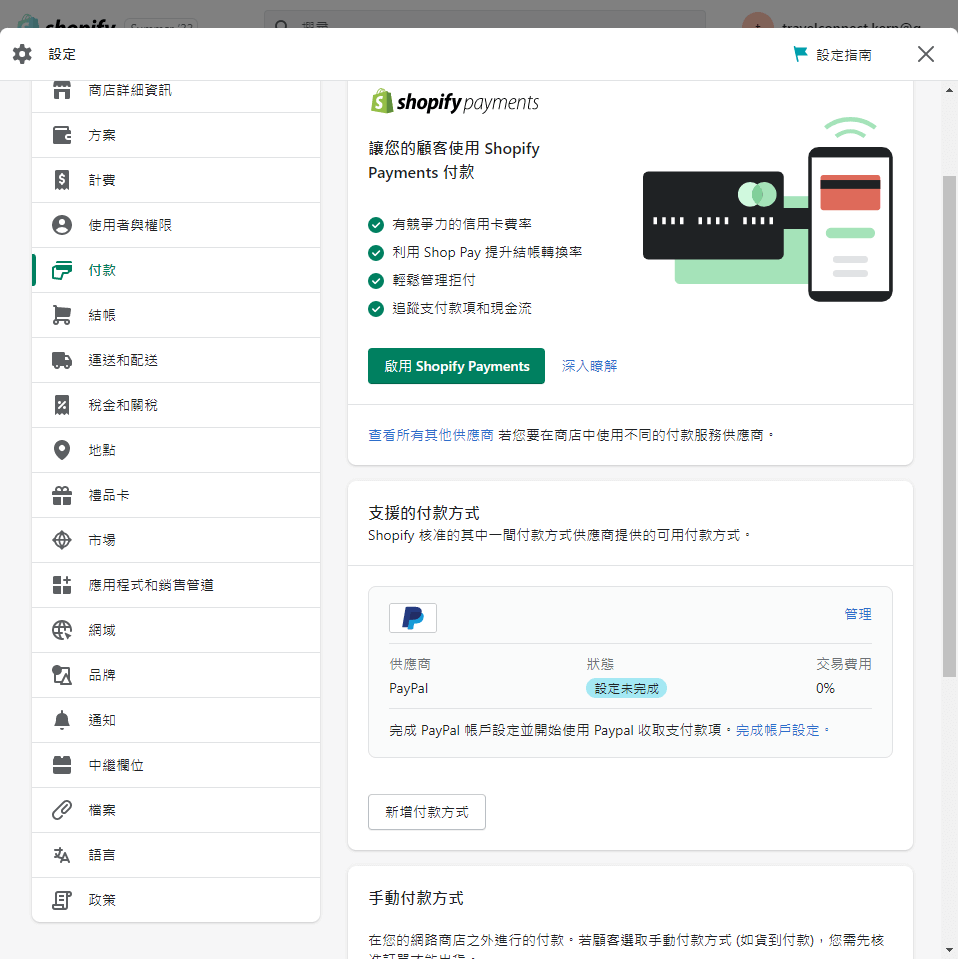
Shopify provides three payment methods, and you can configure them in the “Settings” >> “Payment providers” section. Here are the available payment options:
- Shopify Payments: This is the built-in payment method provided by Shopify. It does not incur transaction fees, and most merchants prefer this option.
- Third-Party Service Providers: You can integrate third-party payment gateways such as PayPal, Alipay, virtual currencies, and others. Shopify supports a variety of external payment options to accommodate different customer preferences.
- Manual Payments: This option allows you to handle payments manually. For instance, you can set up bank transfers or other methods that require manual review and processing.
You can choose the payment methods that best suit your online store’s needs and the preferences of your customers.
Domain Setup
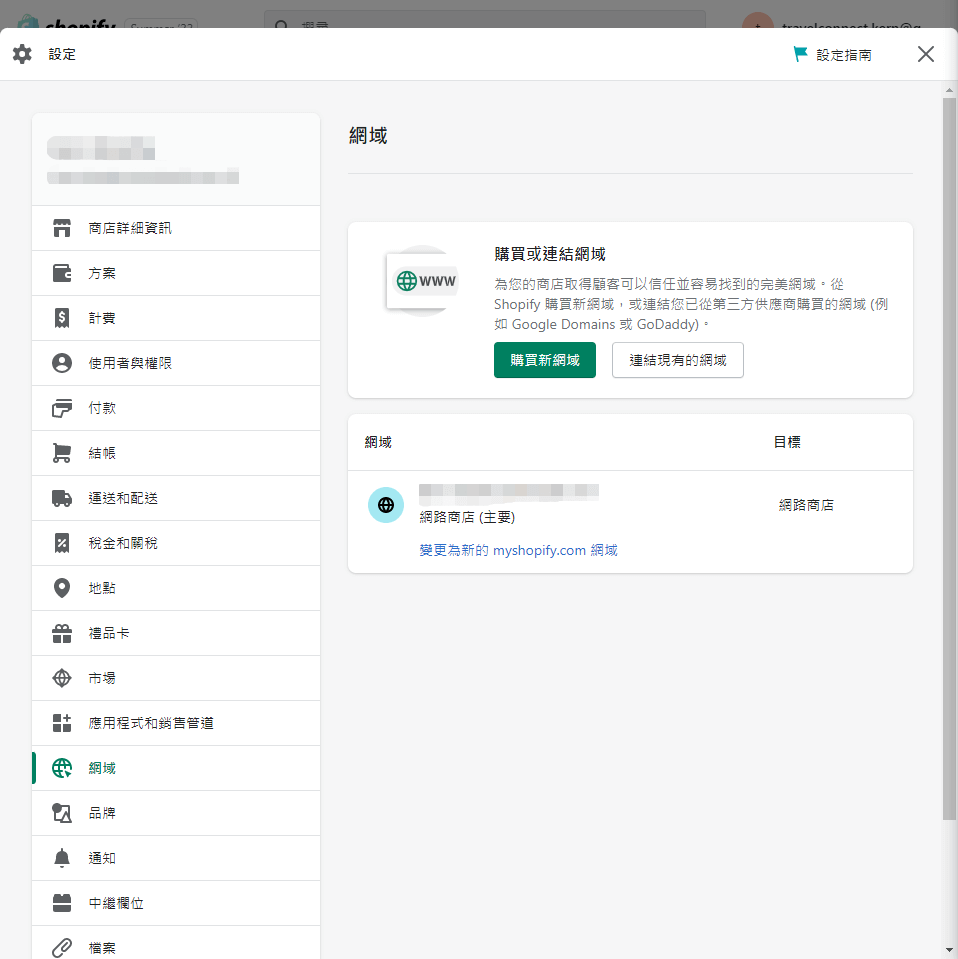
Every website needs its own web address, and your online store requires a domain as well. You can set this up by following these steps:
- Click on “Settings” >> “Domains.”
- Here, you can choose between “Buy a new domain” or “Connect existing domain.”
For a new online store, it is common to purchase a new domain directly through Shopify. Choose the appropriate option based on your needs and preferences.
Order Testing
Before launching your online store, it’s crucial to test the ordering process to ensure everything functions correctly. This way, any issues with the ordering process can be identified and addressed promptly, rather than waiting until a customer places an order. Fortunately, Shopify comes with built-in order testing functionality.
Follow these steps for testing:
- If you are using Shopify Payments, use Shopify Payments Test Mode. If you are using a third-party payment provider, use a simulated gateway (Bogus Gateway).
- Test the entire ordering process to ensure that customers can successfully place orders, payments are processed correctly, and you receive order notifications.
- Remember to turn off the test mode after completing the testing phase. This ensures that your online store is ready for live transactions when launched.
Launching the Online Store
- Click on “Online Store” and then navigate to “Preferences” in the Shopify admin dashboard.
- Disable password protection: If you have enabled password protection during the setup phase to keep your store private, now is the time to disable it. This will allow other people to access your website.
- By removing the password protection, your online store becomes accessible to the public. However, you can continue to make adjustments and modifications to your store settings in the backend as needed.
Conclusion
This tutorial provides a simplified process, and there are additional settings to explore in the Shopify admin panel. Familiarizing yourself with each option will help troubleshoot issues more efficiently, ensuring your online store is optimized for success.
Learn more about e-commerce-related topics >>
4 easy steps! Help you quickly send group messages on WhatsApp
Get started with social e-commerce quickly! WhatsApp Business adds new auto-reply
Facebook Shop tutorial! Teach you how to build your own Facebook store!
Last Updated on 2024-01-24


